Push Notification (thông báo đẩy) đang được ưa chuộng ở nhiều trang web hiện đại, nhằm gửi thông báo quan trọng đến người dùng, ngay trên trình duyệt của họ.
Hình thức gửi thông báo này có phần tương tự API HTML5 Notification trước đây, nhưng tối ưu hơn ở điểm có thể gửi thông báo ngay cả khi người dùng không mở trang web. Và nó cũng thân thiện với người dùng hơn so với hình thức gửi Email vì nội dung sẽ hiển thị ngay khi mở trình duyệt và họ có thể dừng nhận tin bất kỳ lúc nào.
Để ứng dụng công nghệ Push Notification thì trang web của bạn phải được bật SSL (HTTPS), và cấu hình server khá rắc rối. Nếu làm thế thì Forumotion xem như vô vọng rồi. Vì vậy, chúng ta sẽ dùng một dịch vụ trong gian là OneSignal để gửi thông báo. Có nhiều dịch vụ tương tự bao gồm miễn phí và trả phí, có cả từ Việt Nam nữa, nhưng mình chọn OneSignal vì nó cho phép tùy biến tốt hơn và hoàn toàn miễn phí.
Demo
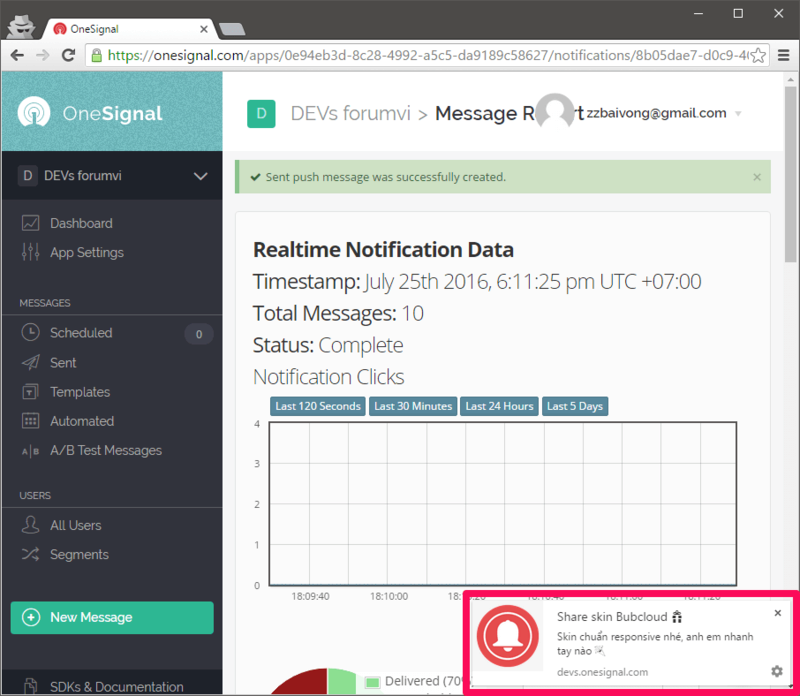
Giao diện quản lý và cách thông báo hiển thị
Hướng dẫn cài đặt
Vì bài viết chứa rất nhiều hình ảnh nên mình sẽ chỉ để hình thu nhỏ, các bạn đọc hướng dẫn khó hiểu thì nhấn vào đó để xem hình gốc.
Bước 1
Mở trang OneSignal.com, nhấn vào nút Sign up free để đăng ký tài khoản.
Bạn có thể dùng tài khoản Github, Facebook có sẵn, hoặc dùng Email của bạn.
Trong mục Company or Organization Name, hãy nhập tên diễn đàn của bạn.
Bước 2
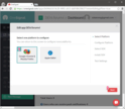
Sau khi đăng ký thành công, đăng nhập vào trang quản lý, lúc này bạn chưa có ứng dụng nào được tạo.

Nhấn Add a new app để tạo ứng dụng mới.
Trong mục App name, điền tên diễn đàn của bạn.
Nhất Create để tạo ứng dụng.
Bước 3
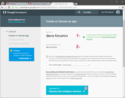
Chọn nền tảng cho ứng dụng vừa tạo.
Chọn Website Push, vì diễn đàn cũng Forumotion thuộc kiểu trang web.
Nhấn Next để tiếp tục.
Bước 4
Chọn nền tảng để cấu hình.
Chọn Google Chrome & Mozilla Firefox để cấu hình trước. Nếu bạn nào sử dụng Mac thì cấu hình Safari trước cũng được.
Nhấn Next để tiếp tục.
Bước 5
Cấu hình cho Google Chrome và Mozilla Firefox.
Để thực hiện được bước này, bạn phải có Server API Key và Sender ID.
- Hướng dẫn tạo Server API Key và Sender ID:
- Truy cập Google Services Wizard. Yêu cầu có tài khoản Google, nếu chưa có thì đăng ký hoàn toàn miễn phí.
Điền tên ứng dụng vào mục App name. Yêu cầu không dùng ký tự đặc biệt.
Mục Android package name không dùng nhưng cũng phải điền. Yêu cầu viết thường, không khoảng cách, không ký tự đặc biệt, có một dấu chấm ở giữa để giả như tên package trong Android.
Nhấn vào nút Choose and configure services để tiếp tục.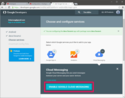
Nhấn nút Enable google cloud messaging.
Lúc này bạn sẽ có được Server API Key và Sender ID.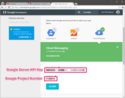
Server API Key này sẽ tương ứng với Google Server API Key và Sender ID sẽ tương ứng với Google Project Number trong cấu hình ứng dụng trên OneSignal.
Điền đầy đủ thông tin. Lưu ý, trong khung này có nhiều mục nên phải cuộn xuống (trong khung) để xem hết.

Site URL: Điền URL diễn đàn của bạn. Ví dụ:
- Code:
http://devs.forumvi.com
Google Server API Key: Điền Server API Key của ứng dụng bạn tạo trên Google Services Wizard.
Default Notification Icon URL: Điền URL icon, kích thước tối thiểu 192 x 192 px. Bạn nên dùng logo của diễn đàn, nếu không, có thể dùng URL sau:
- Code:
http://i.imgur.com/srF9Tzi.png
Tích vào My site is not fully HTTPS.
Choose Subdomain: Nên điền tên miền diễn đàn, nó sẽ được dùng làm tên miền phụ của OneSignal. Ví dụ mình điền devs, nó sẽ thành:
- Code:
https://devs.onesignal.com
Google Project Number: Điền Sender ID của ứng dụng bạn tạo trên Google Services Wizard.
Nhấn Save và qua bước tiếp theo.
Bước 6
Chọn bộ SDK để tích hợp vào diễn đàn.

Chọn Website Push.
Nhấn Next để tiếp tục.
Bước 7
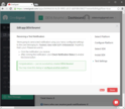
Cài đặt SDK của OneSignal vào diễn đàn.

Ghi lại mã Your App ID.
Không đóng OneSignal. Đi đến diễn đàn của bạn để cài đặt SDK.
Lưu ý không dùng trình duyệt ở chế độ ẩn danh, tắt các tiện ích chặn Popup và nên dùng Google Chrome.
Sao chép và chỉnh sửa code sau:
- Code:
<script src="https://cdn.onesignal.com/sdks/OneSignalSDK.js" async='async'></script>
<script>
    var OneSignal = OneSignal || [];
    OneSignal.push(['init', {
        appId: 'APP_ID',
        safari_web_id: 'SAFARI_WEB_ID',
        autoRegister: true,
        subdomainName: 'SUBDOMAIN',
        notifyButton: {
            enable: true,
            size: 'small',
            position: 'bottom-left',
            prenotify: true,
            showCredit: false,
            text: {
                'tip.state.unsubscribed': 'Đăng ký nhận thông báo',
                'tip.state.subscribed': 'Bạn đã đăng ký nhận thông báo',
                'tip.state.blocked': 'Bạn đã chặn hiển thị thông báo',
                'message.prenotify': 'Click để đăng ký nhận thông báo',
                'message.action.subscribed': 'Cảm ơn bạn đã đăng ký!',
                'message.action.resubscribed': 'Bạn đã đăng ký nhận thông báo',
                'message.action.unsubscribed': 'Bạn đã hủy đăng ký nhận thông báo',
                'dialog.main.title': 'Quản lý thông báo',
                'dialog.main.button.subscribe': 'ĐĂNG KÝ',
                'dialog.main.button.unsubscribe': 'HỦY ĐĂNG KÝ',
                'dialog.blocked.title': 'Bỏ chặn thông báo',
                'dialog.blocked.message': 'Thực hiện các hướng dẫn sau để cho phép thông báo:'
            }
        },
        welcomeNotification: {
            title: 'SITE_NAME',
            message: 'Cảm ơn bạn đã đăng ký!'
        },
        promptOptions: {
            siteName: 'SITE_NAME',
            actionMessage: 'Chúng tôi muốn hiển thị thông báo cho bạn khi có bài viết hoặc cập nhật mới.',
            exampleNotificationTitle: 'Thông báo mẫu',
            exampleNotificationMessage: 'Ví dụ cách thông báo sẽ hiển thị',
            exampleNotificationCaption: 'Bạn có thể dừng nhận thông báo bất kỳ lúc nào',
            acceptButtonText: 'CHO PHÉP',
            cancelButtonText: 'BỎ QUA'
        }
    }]);
</script>
Trong code trên:
Thay APP_ID bằng mã Your App ID vừa lấy.
Thay SUBDOMAIN bằng tên miền phụ từ OneSignal tạo ở Bước 5 (mục Choose Subdomain).
Thay 2 vị trí SITE_NAME bằng tên diễn đàn của bạn.
Sau khi chỉnh sửa xong, mở template overall_header:
ACP >> Display >> Templates >> General >> overall_header
Tìm </head> và thêm code vừa chỉnh sửa vào phía trước nó.
Save template và Publish.
Bước 8
Kiểm tra hoạt động. Truy cập diễn đàn của bạn và kiểm tra thông báo.

Nhấn CHO PHÉP trong bảng yêu cầu xác nhận hiện ra. Nếu không hiện thì có thể code bạn sửa bị sai, kiểm tra lại Bước 7.
Sau đó một Popup sẽ hiện ra. Nhấn Cho phép (Allow) khi được yêu cầu xác nhận hiển thị thông báo.

Nếu nó không hiện, kiểm tra xem bạn có dùng tiện ích chặn Popup không, nếu có thì tắt nó đi, rồi nhấn vào icon thông báo ở góc dưới, bên trái diễn đàn.
Nếu bạn dùng trình duyệt ẩn danh sẽ không thể cho phép hiển thị thông báo được.
Bước 9
Kiểm tra người dùng nhận thông báo. Lúc này thì đó chính là bạn.

Nhấn vào nút Check Subscribed Users.
Nếu bạn làm Bước 8 đúng thì sẽ qua được bước này. Nhấn Next để tiếp tục.
Bước 10
Kiểm tra hoạt động của ứng dụng.
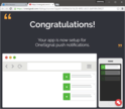
Nhấp vào nút Send Test Notification, một thông báo sẽ được hiện ra.

Nhấn vào thông báo vừa hiện ra, trình duyệt sẽ mở một tab mới, dẫn đến trang kiểm tra ứng dụng hoạt động.
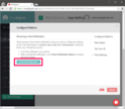
Tắt trang kiểm tra đó và quay lại trang cấu hình. Nhấn vào nút Check Notification Status.
Nhấn Done.
Vậy là bạn đã cấu hình xong cho Google Chrome và Mozilla Firefox. Nhấn Done để kết thúc.
Bước 11
Cấu hình cho Safari.
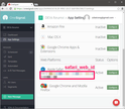
Nhấn vào App Settings.
Nhấn nút Configure ở dòng Apple Safari.
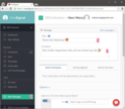
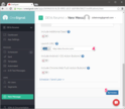
Bước 12
Điền đầy đủ thông tin. Lưu ý, trong khung này có nhiều mục nên phải cuộn xuống (trong khung) để xem hết.

Site Name: Điền tên diễn đàn của bạn
Site URL: Điền URL diễn đàn của bạn.
Không tích vào I'd like to upload my own .p12 certificate
Tích vào I'd like to upload my own notification icons, và tải lên logo diễn đàn của bạn theo các kích thước được yêu cầu. Nếu không, bạn có thể tải về Bộ icon BELL để sử dụng.
Nhấn Save và qua bước tiếp theo.
Bước 13
Lấy mã Web ID cho Safari
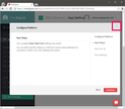
Đóng Dialog lại, bằng cách nhấn vào Kí hiệu X.
Do mình không có máy Mac nên không hướng dẫn tiếp được. Hơn nữa, bước tiếp theo chỉ là kiểm thử ứng dụng tương tự như Google Chrome và Mozilla Firefox, chỉ còn thêm Web ID cho Safari vào code mà còn sai nữa thì mình cũng chịu.
Dù sao bạn cũng yên tâm, mình đã nhờ người kiểm tra bằng Safari trên Mac rồi, đảm bảo hoạt động.
Sau khi đóng Dialog thì tại dòng cấu hình Apple Safari bạn sẽ thấy mã Web ID của nó, sao chép lại.
Đi đến diễn đàn của bạn, mở template overall_header.
Tìm trong code mà bạn đã thêm vào ở Bước 7.
Thay SAFARI_WEB_ID bằng mã Web ID mà bạn vừa lấy được.
Save template và Publish.
Vậy là xong rồi đó, giờ bạn đã có thể tạo thông báo cho người dùng (nếu họ cho phép).
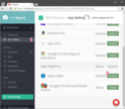
Cách tạo thông báo
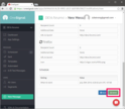
Nhấn New Message
Điền tiêu đề thông báo trong mục Title và nội dung trong mục Content.
Nhấn vào Options để mở tùy chọn thêm.
Mở mục Launch URL và điền URL, để khi người dùng nhấn vào thông báo, trình duyệt sẽ chuyển đến URL đó.
Các tùy chọn khác, ít dùng hơn:
Include Additional Data: Bạn sẽ cần biết cách dùng API, có kiến thức javascript kha khá mới dùng được.
Include Android / iOS Action Buttons: Dùng cho ứng dụng Web, không sài được.
Include Chrome Web Push Action Buttons: Tùy chọn này chỉ hoạt động trên Google Chrome 48+, nó cho phép tạo thêm tối đa 2 nút phụ bên dưới thông báo.

Sau khi thông báo được gửi, bạn cũng có thể xem thống kê số người dùng tương tác với nó.
Nguồn
Zzbaivong (devs.forumvi.com)
Tags: #firefox #mod #tutorial #phpbb2 #phpbb3 #punbb #invision #notification #chrome #safari


 Create a new javascript